Wednesday, December 29, 2010

A Very Crock Pot Christmas

This post I had wanted to do before Christmas, so that those who might have been looking for crock-pot-related gifts might have some ideas, but since I was giving my sister a crock pot cookbook for Christmas, I couldn't spoil the surprise, so it had to wait.  So here are my suggestions for crock-pot-related gifts...

I have been spreading the crock pot love around my family since I first fell in love with the crock pot.  It was originally my grandmother that got me into slow cooking. She kept telling me to get a crock pot, so I finally did, but it really wasn't until my brother gave me my first crock pot cookbook, that I really started to get into it. Now, as you may recall from the 
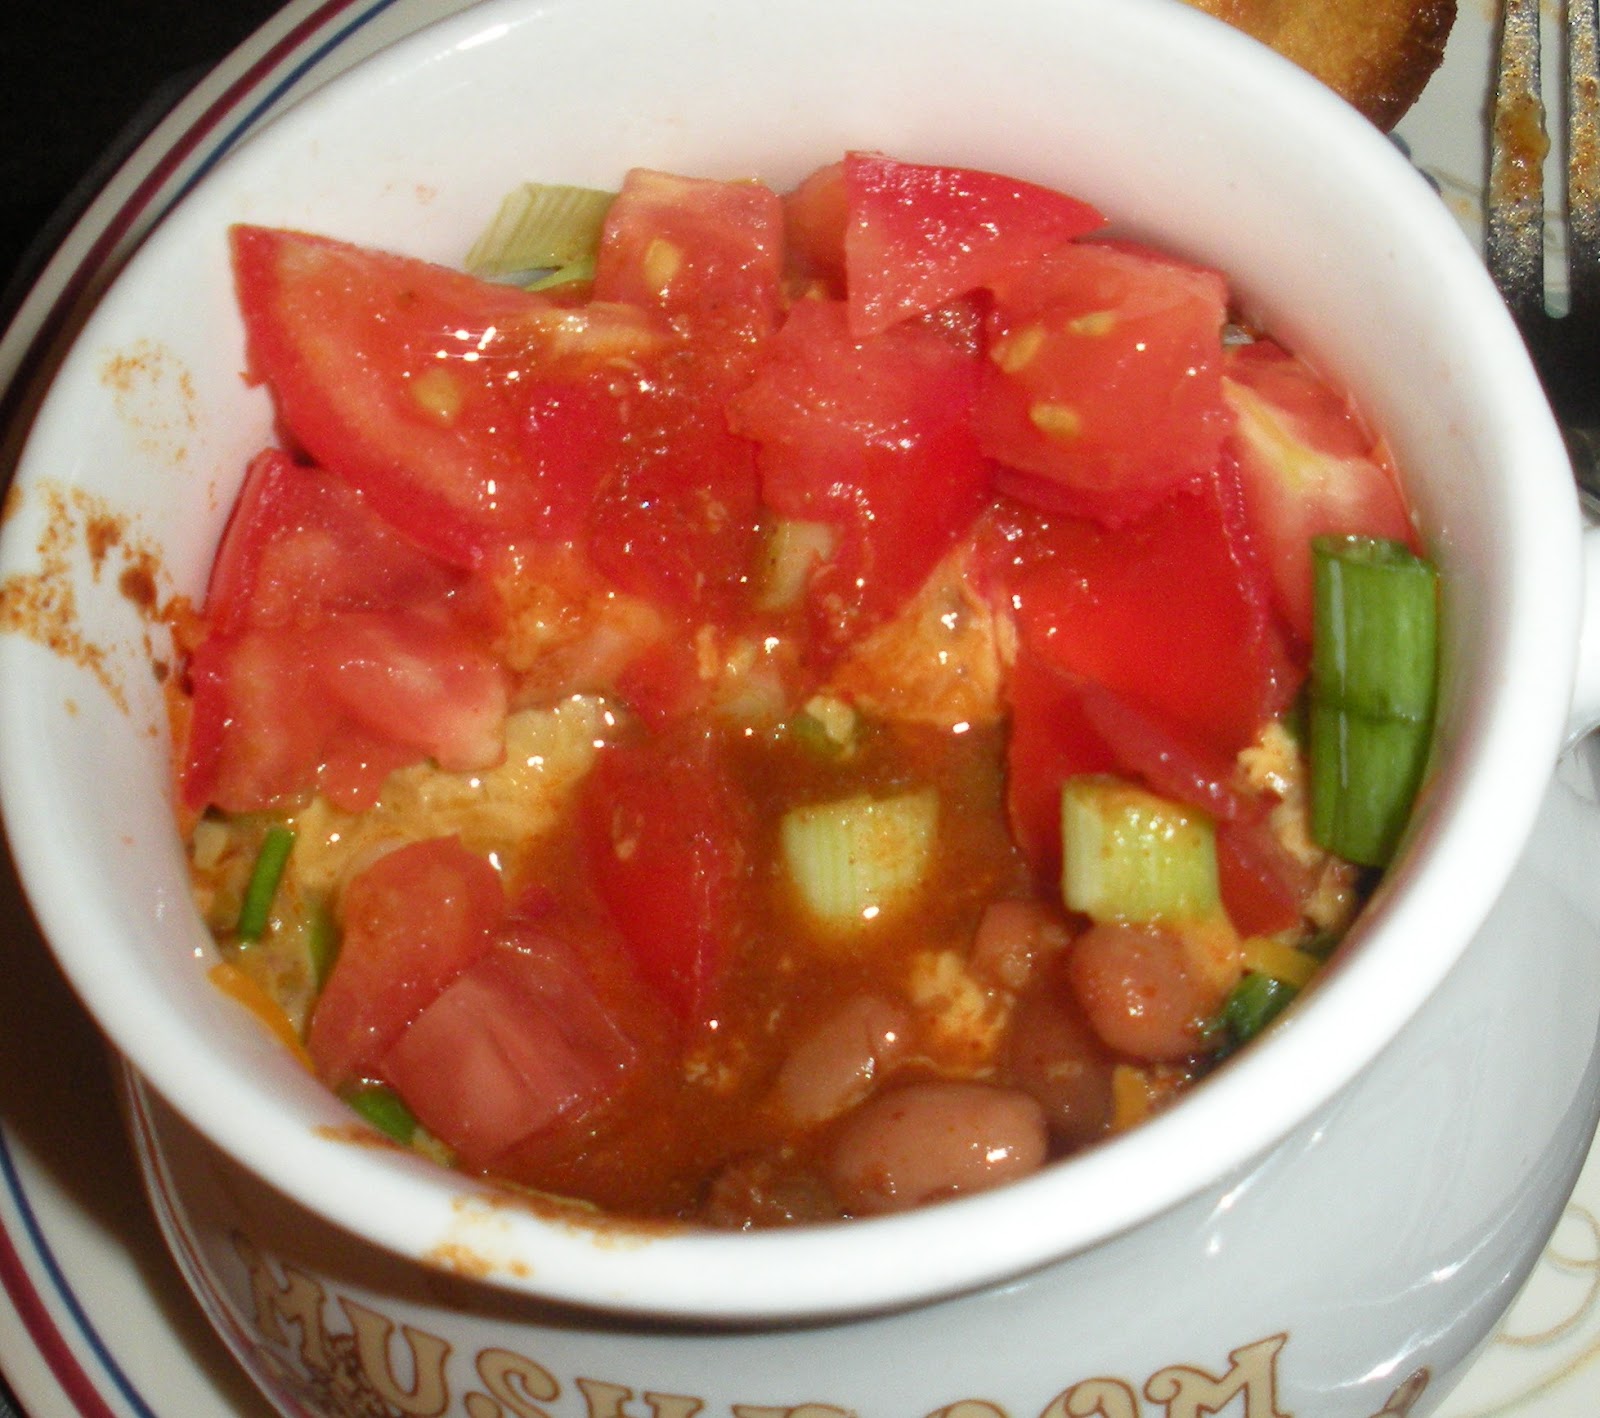
chicken tagine post, many normal recipes can be easily adapted to the crock pot, and many people prefer trying to adapt their own recipes to the crock pot, but I personally love trying out recipes that have already been put together and deciding if I like them or not -- hence, this blog.

Once I started slow cooking all the time, I gave both my brother and my sister the basic 4-quart oval Crock Pot.  This is the very basic slow cooker, with no bells and whistles.  It is inexpensive and easy to use.  It comes with an instruction book with a few basic recipes (some soups, chili, ribs -- which are amazing when slow cooked, by the way).  It is easy to clean; even really caked on food, like chili, I tend to just let soak in hot soapy water for a while and then it comes right off.  It's also apparently dishwasher safe, something that I did not know until I was looking at the box of the one I gave my sister since I haven't yet lived at a place with a dishwasher since I've been using the slow cooker.

Now, if you really want to spoil that grad student in your life, I highly recommend getting, instead of just the basic slow cooker, one with a timer.  A little more high tech is the Hamilton Beach "Set 'n Forget" programmable slow cookers, in various sizes (I've included an image from Amazon.com of the 6-quart size, below and to the left.)  I have not used this one, but like the two- and three-pot slow cookers, it's one that I covet.  It has the normal manual setting, but then two automatic settings that allow the slow cooker to automatically change from the cooking feature to "warm," either by time or with the meat probe that automatically switches the slow cooker to warm when the meat is at the correct temperature.  I mean, how cool is that?

There are many options for slow cooker cookbooks out there, so I'll just mention some.  The cookbook that my brother gave me, that started my whole crock pot love, is the Crock-Pot Incredibly Easy Recipes cookbook.  There are several chapters in this book that are really useful for the graduate student, including the "one-step" dishes (where you just throw everything into the crock pot and turn it on) and the "4-ingredients or less" dishes.  My brother first gave me this cookbook for Christmas when I was doing my Master's, and when I got back to school from visiting my family, the first thing I made was orange chicken from this book, a recipe that my fiance affectionately calls "soda chicken" because the only ingredients are orange soda, soy sauce, and chicken.  That's really good for those of us on a budget.  What I especially love about this book is that it includes images.  Now, granted, the images often look nothing like the food that comes out of the crock pot (and seriously, often look like there's no way that someone made them in a crock pot), but it's fun to compare what you've made to what it looks like.  There is a wide variety of recipes in this book, but it's short enough that I've now gotten to the point that I've almost made all of them!

Now, another, larger, option, with some of the same recipes, is the Crock-Pot Slow Cooker Bible, which is what I just got for my sister for Christmas (after having given her the crock pot for her birthday).  This book has even more recipe selections than the one I have, and is great if you want a lot of options.

The other cookbook that I regularly use is the Not Your Mother's Slow Cooker Cookbook, which I "borrowed" from my fiance several years ago and now lives with me at school.  These recipes are often a little more difficult than the ones in my original cookbook, because they often take a few extra steps when you're making them.  However, the options are great and I love how they have a bunch of alternatives for the same dish, like, for example, the lentil chili and Senator Barry Goldwater's chili (which, by the way, are only two of the options from the whole chapter devoted to chili!).  Alas, this book does not include pictures, but I think overall I find the recipes in it to be more creative than some of the ones in my original cookbook.  Of course, now I also covet the Not Your Mother's Slow Cooker Recipes for Two.

Finally, for my birthday this year, I received from my future mother-in-law the Gourmet Slow Cooker: Simple and Sophisticated Meals from Around the World.  It is divided into chapters by countries, including dishes from America, Ireland, France, Italy and India.  The pros about this book are the amazing images and the variety of recipes, which all seem absolutely amazing.  The con, however, is that many of the recipes are not made to be cooked, nonstop all day which makes them difficult for a graduate student (except in the sense that, if I wanted to, I could work from home, but I focus better at the office most of the time).  An additional con is that the recipes call for "gourmet" ingredients, including fresh herbs and spices that you grind yourself.  Now, obviously, you can substitute store-bought for the spices, so it's not really a "con" in that sense, but to really make the recipes the way they write them, you'd have to have a lot more time to cook.

Anyway, those are just some of my suggestions for good crock pot cookbooks.  I'd love to know if anyone else has some good ones that they use because I'm always up for more cookbooks from which to try and rate recipes.

Tuesday, December 7, 2010

Slow-Cooked Beef Brisket Dinner

There are quite a few recipes in the Crock-Pot Incredibly Easy Recipes cookbook that call for beef brisket.  Now, some of these recipes that I've made in the past I've just substituted some other cut of beef, because brisket is just so expensive.  However, the place to get beef brisket, I discovered, is Costco, where I found a piece for only $11.45, half of what I've ever seen in a grocery store.  I purchased this before I decided what to make with it and ultimately decided to go with the "Slow-Cooked Beef Brisket Dinner" because, even though the picture didn't look all that interesting, I thought that it would be a good "complete meal in one pot" deal.

Apologies in advance, however.  I made this on October 20 and I completely forgot to take pictures as I was doing prep.  I was smart, however, and chopped all of the vegetables in advance: potatoes, carrots, onion, and celery.  This recipe is super easy.  You just throw everything in the crock pot, that is, the brisket cut in half, the vegetables mentioned above, sliced mushrooms, crushed garlic, and seasonings.  In terms of seasonings, this recipe calls for beef bouillon, black peppercorns, and bay leaves.  We didn't have any whole peppercorns, so instead I substituted an equal amount of ground pepper.  Finally, you cover the entire thing in water and cook it on low for 6-8 hours.

This is what it looks like when done cooking.

The issue I had in this case was that the brisket, which was about 4 lbs (which is what the recipe calls for!), plus all the vegetables, did not fit in the crock pot.  Honestly, I have no idea what size crock pot they were using when they made this recipe, because it would need to be at least twice the size of mine!  I ended up making it in two batches.

The last step is to season the brisket with salt and pepper, and cut it.  The image on the left is of what the food actually looked like when I served it.

The image on the right is what it's supposed to look like according to the cookbook.  As you can see, the vegetables end up looking more bland than they are in the image.

So, unfortunately, I cannot evaluate this meal in terms of calories or cost.  It was an okay meal, but really it was just that: okay.  The meat was kind of bland.  The vegetables absorbed much more of the seasoning so I liked them more, but when it came down to leftovers, I wasn't as thrilled by them.  Ultimately, I had it a few more times, but then kept making something else for dinner because I didn't want to eat the leftovers... until the food ultimately went bad and I threw it out.

I wrote in my cookbook that it was "bland and boring when first served, but horrible as leftovers" and noted "don't make again."

Monday, November 29, 2010

Turkey with Pecan-Cherry Stuffing

Normally with this blog I wait until after I've eaten all of something that I've made in the crock pot, so that I can accurately evaluate the calories and the cost per serving of the recipe.  However, in this case because I made a special crock pot Thanksgiving meal, I though it would be more appropriate to blog about the recipe this week, even though I won't have the same analysis that I would otherwise.  (Also: warning, this will be a very image-heavy post because I took a lot of pictures this time.)

Since I was staying at school for Thanksgiving this year, I thought I'd take the opportunity to make a Thanksgiving meal for myself, but using the crock pot!  I've admired the "Turkey with Pecan-Cherry Stuffing" recipe in the Crock Pot Incredibly Easy Recipes cookbook for a while now, but because it is only supposed to cook for five or six hours, I felt like it should be done on a day that I was staying home.  As you'll see, this is not one of those ones that you can just leave on and let cook as long as you want.

As you can see from the first picture above, there is not a lot of pre-preparation to do, especially if you get pecans that are already chopped like I did.  The only thing I had to do was cook rice, and I got brown rice for this recipe to be healthy.  While the rice was cooking, I peeled the skin off the turkey breast and cut slices in it, only going part-way through the breast though.  As you'll see from the picture from the book below, I was concerned about the look of this, but this was the shape of my turkey breast so I just kept following the recipe.  The recipe says that the breast should be 3-4 lbs, and this was about 3.9, so it should've been fine.

After the rice cooked, I mixed together the "stuffing."  I think I may have had too much rice for the recipe though: it calls for two cups of cooked rice.  I used one cup dry, assuming that it would make two cups cooked, but it's possible that it cooked up to more than that.  Thus, when I added the pecans, cherries, and poultry seasoning it didn't seem like everything ended up in the right proportions so I added more pecans and cherries.

This is what the stuffing looks like all mixed together, before I "stuffed" the turkey.

Now what you're supposed to do is stuff the stuffing where you sliced part-way through the turkey.  I actually made some more slices once I started stuffing the turkey because I had so much stuffing left over.  Then I tried to transfer the turkey to the crock pot, but it was so unwieldy that the only way I was able to get it into the crock pot in one piece was with my roommate's help!

As you can see from this picture, I ended up just putting the rest of the stuffing on top of the turkey to cook in the crock pot with the rest.  I didn't want to just throw the extra away, but the spoon had been going back and forth into the raw turkey breast so I wasn't about to do anything with it without cooking it.  So, the recipe says, to cook the turkey breast on low "5 to 6 hours or until [the] turkey registers 170... on [a] meat thermometer inserted into the thickest part of [the] breast, not touching stuffing."  After 6 hours I tested the turkey in two places: the first registered 170, but the second was only 160, so I decided to leave it on while I made the rest of my Thanksgiving dinner: green beans and mashed potatoes.

The last part of the recipe is a simple sauce for the turkey breast, used instead of gravy.  I made it with apricot preserves (though the recipe says you could use peach or plum also) and Worcestershire sauce.

This gets mixed together and spread on top of the turkey.  Then you let it sit for 5 more minutes, covered, before taking it out to serve.  Of course, the problem with having such a large turkey breast that it took two people to get it into the crock pot is getting it out after I've taken my roommate to the airport!  To say that it was difficult would be an understatement.

This is the train wreck it looked like after I took it out of the crock pot.

And yet, this is what it is supposed to look like according to the cookbook!

Of course in spite of the disastrous appearance, as a meal, this was really good!  I made roasted-garlic mashed potatoes and green beans to go with it.  The only problem is that the turkey came out a little dry.  This was completely my fault, however.  I shouldn't have let my paranoia about cooking the turkey enough get the best of me when I tested the temperature.  I think the turkey was probably done... I just let it cook too long while I was making the rest of the meal.  So if I were to do this again, I'd stop after six hours, for sure.

So, as I mentioned at the beginning of this post, normally I'd tell you about the number of calories per serving and the cost per serving, but since I have not finished eating this, I can't tell you how many servings it will take.  The cookbook claims that it will make 8 servings, but I honestly think I'll be eating this until I go home for Christmas break!  So, it's definitely a good recipe to make if you want it to last.

Tuesday, November 23, 2010

Senator Barry Goldwater's Arizona Chili

I apologize for skipping last week.  I meant to update, but had a presentation in my Italian class on Dante's Divine Comedy which took up my time.  It's coming to the end of the semester so my updates may end up being more sporadic, but I'll do my best (besides, the crock pot is awesome for the end of the semester when you don't want to have to cook a full meal every night).

On October 12, after my chili craving not being satisfied by the Lentil Chili, I decided to make the most basic chili recipe I could find in the Not Your Mother's Slow Cooker Cookbook, Senator Barry Goldwater's Arizona Chili.  This is one that you need to start the night before, because the pinto beans need to soak overnight in cold water.  So I sat and sorted beans while watching Law & Order: SVU, my favorite distraction.  The only veggie prep is to chop two onions, but because of the way the recipe tells you to cook everything, you don't necessarily have to do it the night before.

So the thing about this recipe is that, like the Boston Baked Beans, you have to pre-cook the beans, with three whole garlic cloves, on high for two to two and a half hours (the cookbooks says, "until tender but not mushy").  The cookbook says that you could do this the night before and refrigerate the beans overnight, but I chose to get up early and do it in the morning.

After starting the beans cooking, you can chop the onion if you didn't do it the night before.  Then you brown the onion and ground beef on the stove.  This doesn't take much time, so you can do something in the meantime, like take a nap.  Or, like me, you could do a workout video, shower and get dressed for the day.  :)

After the beans cook, you drain them and take out the garlic cloves, as these are not part of the chili.  Then the mean, onions, and beans go into the crock pot.

The only other ingredients are to add some flavor and sauce: tomato paste, chili powder, and ground cumin.  Then you add enough water to cover the beans and stir everything to mix it up really well.

This is what the chili looked like before I turned it on.

And this is what it looked like after cooking on low for eight to nine hours.

The recipe calls for adding 2 tsp salt in the last hour of cooking.  Adding things mid-way through cooking is difficult for the grad student; you really have to time it so that you can get back home in order to do those things.  Of course, if you've been reading this blog, you know that I don't add salt to most recipes anyway, so that doesn't matter for me.

The recipe recommends serving it with shredded sharp cheddar cheese, chopped fresh tomatoes, and chopped green onions.  It also recommends cornbread or saltine crackers on the side, so I made corn muffins to go along with this recipe.  I picked up a simple Jiffy corn muffin mix when I went shopping so I'd have it just for this recipe.

My roommate and I had the chili the first night after I made it.  We ultimately decided that it was a solid, basic chili recipe, but I cannot emphasize enough how really basic it is.

Of course, it's not too bad for a week of dinners--I got six servings total out of the recipe, which is pretty much what was expected (the recipe says that it serves four to six).  Chilis can often have a lot of calories.  I was looking at cans of chili in the store earlier today and each can said that there were 250 calories per serving... but a serving is half a can... and who ever eats only half a can of anything (except maybe my mother).  My chili comes out about the same: just over 260 calories per serving.  But that's still for the actual serving you eat (as opposed to the "fake" serving in the can of chili).

In terms of cost, I only spent $13.14 on all the ingredients for this dish, and that includes splurging on extra lean ground beef so it'd be healthier.  That comes out to $2.19 per serving, not bad at all if you're trying to stretch your stipend!

Sunday, November 7, 2010

Lentil Chili

Has it really been a month since I last updated this blog?  Time has gone by so quickly, so I must apologize for being delinquent in my updates.

On October 5, I made Lentil Chili from the Not Your Mother's Slow Cooker Cookbook.  I had a bit of a craving for chili, but I didn't want to make just your standard chili and I thought that this recipe would be a good way to switch it up a bit.

I have to apologize because I completely forgot to take pictures as I was assembling the chili. That said, this is one of those great recipes for a grad student (or anyone who is equally busy) because you just throw all the ingredients together.  As you may be able to see from the image, there are relatively few ingredients... except for the seasoning.  You throw in yellow onion, red bell pepper, jalapeno, celery, carrot, garlic, and lentils.  For seasoning, it takes brown sugar, chili powder, cumin, cayenne pepper, oregano, thyme, and dry mustard.  It is all cooked in chicken broth.  The recipe says that you should cook it on low for six to eight hours "stirring occasionally, if possible."  It was most definitely not possible for me to stir occasionally, and it came out fine, having just mixed it all together at the beginning and then letting it cook.

For the last hour, you're supposed to add olive oil and salt.  I, predictably, left out the salt.  I would like to note, however, that I let this cook a lot longer than just eight hours and it came out fine--one of the great things about the crock pot is that you can just let many of the recipes keep cooking without a problem if you can't get home eight hours after you turn it on.  I normally leave for school around eight and return sometime between five and six on the days that I make crock pot recipes.  I generally select recipes that already need to cook for a long time (so, none that are only 3-4 hours) and turn it on last thing before I leave the house.

I followed all of the serving suggestions from the cookbook: topped with sour cream, chopped fresh tomatoes, chopped green onions, and chopped fresh cilantro and served over brown rice.  I think that serving it over the rice really helped make this dish last.  The recipe says that it serves four to six and I think I got about ten servings out of it!  This means that this is very low calorie: maybe only about 70 calories per serving for the lentils alone.  For the entire meal, I'd add about 50 calories for the toppings and 100 for the brown rice (though it could be less depending on how much you use) for a total of only 220 calories per serving.

In terms of cost, this was a very cheap meal to make, especially since I already had some of the ingredients, namely all of the seasonings and the olive oil--the items which would be the most expensive to purchase.  But, everything else only cost me $17.05, so just about $1.70 per serving!

What did I think about this chili?  It was really good.  But, it did not satisfy my craving for chili.  It's called a chili in the cookbook, but if you want chili, this will not do.  Next week you'll get to see the chili I did make because this dish did not satisfy my craving.

Saturday, October 2, 2010

Chicken Tagine

My mother got me a subscription to the Nutrition Action Healthletter, a short newsletter that comes every month and includes articles about what science is saying you need to be healthy, as well as critiquing some of the additives in food, the size of restaurant meals, etc.  Each moth there are also three healthy recipes around a theme.  September's theme was chicken and included a recipe for Chicken Tagine (follow the link for the recipe).  As I'm reading, I usually skim through the recipes without trying any of them, but the description for this said, "A tagine is an aromatic North African stew that's named after the heavy clay pot in which it's traditionally cooked."  That description just screams "crock pot recipe."

I decided to just follow the recipe as much as I could at the beginning, before throwing everything into the crock pot and letting it cook for 6-8 hours on low.  I tried to figure out what a good recommendation would be for cooking chicken, but everything I looked at only said what temperature the chicken should be at when cooked, not how long it would take.  Ultimately, I decided on 6-8 hours on low because most of the chicken recipes I've made in the past cook for that long.

Anyway, I started following the recipe by browning the chicken as suggested, before I added it to the crock pot.  I did use boneless, skinless chicken thighs as the recipe asked.  Though every time I use chicken thighs I realize that I don't like that cut of meat as much and should just use boneless, skinless chicken breasts for all of these recipes.  After transferring the meat to the crock pot, I sauteed the whole wheat flour, spices (tumeric, ground cumin, paprika, and cayenne), and minced garlic and added it to the crock pot on top of the chicken.

At this point I just started throwing in all of the ingredients.  I hadn't planned in advance very well, and was running out of time before I had to go to class.  Luckily, my fiance was in town and volunteered to help by cutting all the vegetables.  As you can see from the picture on the left, we added zucchini, chicken broth, and the stick of cinnamon first.

Then I added the tomatoes.  As you can see from the picture on the right, I screwed up and paid so little attention that I didn't notice my screw up until I opened the can of tomatoes.  The recipe calls for a can of diced tomatoes and these, clearly, are not diced.  However, I actually really enjoyed the way the stew came out in the end with the whole tomatoes and might repeat this mistake if I make the stew again.

At this point, I had to leave for class so I left my fiance to finish chopping the other vegetables.  However, if I had planned ahead, none of this would have been a problem because the night before I could've chopped all the vegetables, measured out the spices, and minced the garlic.  That way, in the morning, I would just have to brown the chicken, saute the spices and garlic, and assemble the crock pot.  My fiance added the final vegetables, the carrots and onion.  I asked him to take a picture of what the entire thing looked like assembled before cooking.


This is what happens when you ask a boy to take a picture of the assembled crock pot for your blog.

And this is what the stew looked like when it finished cooking.

Now, I just have to say that this stew was absolutely delicious.  My fiance actually said that it was one of the best dishes I've ever made in the crock pot.  I did not add any salt to it (the recipe says to season it with salt at the end), but we did serve it over couscous (though I couldn't find "whole wheat couscous" in my local grocery store).

The cool thing about the Nutrition Action Healthletter recipes is that they calculate the nutrition information for you and this dish only has 320 calories per serving (and I did get six servings out of this).  Now, I think in reality it was probably a little higher than that because I think we had more couscous in each dish than they think we should have, but even then there is no way that the dish went over 400 calories.  When getting the ingredients for this, I already had the EVOO, most of the spices (except cinnamon sticks), garlic, carrots, and an onion.  For the things I had to purchase, the total cost per serving comes out to just over $3.75, which is mostly that high because the couscous wasn't on sale.  Overall: as a graduate student I highly recommend this as a healthy, low-cost dish.