Sunday, February 20, 2011

French Split Pea Soup

Recently I've been trying to catch up on posts about crock pot meals that I made at the end of last semester, but never had an opportunity to actually post about.  I've already mentioned in several posts the birthday gift that I received from my future mother-in-law, The Gourmet Slow Cooker: Simple and Sophisticated Meals from Around the World.  Well, the first meal that I made in that was back in the beginning of November, French Split Pea Soup.  The difficult thing about this cookbook, that I've mentioned before, is that it often requires either several steps to prepare the ingredients, or asks you to add additinal ingredients part-way through the recipe.  Now, in some ways this could be considered good for the graduate student lifestyle--when you have the ability to work from home, you can easily be at home to add additional ingredients, or take longer to prepare the crock pot in the morning.  For those who spend all day at school, like me, however, such recipes are more difficult.

So, this French Split Pea Soup is probably the easiest recipe to put together in the whole cookbook.  All of the preparatory work, rinsing and sorting through the split peas and chopping the onion, carrots, and celery, can be done the night before, making the actual prep work in the morning a piece of cake.  (As you can see from the image above, I did the prep work the night before to make it much easier for me to throw everything together in the morning.)

So, in the morning when you get up, you just need to mix all the ingredients you prepped the night before in the crock pot.  Another thing that is good about this recipe is that it doesn't necessarily require any broth.  The recipe asks for water or chicken stock.  I did use chicken stock, but that was only because it was on sale and I had a coupon.  If I hadn't had that coupon, I would have definitely just used water in this recipe.

The last ingredient, which unfortunately makes this a not-vegitarian-friendly recipe, is a smoked pork chop, which you can see me adding to the right.

I cannot emphasize enough throughout this post how easy this recipe is.  After mixing all the ingredients together, as I've illustrated here, you just cook the soup on low for 8-10 hours.  That timing is perfect if you have to be out of the house all day at school (or work) and the house will smell amazing when you get home.  After letting it cook for that long, you just remove the bone from the pork chop (which will come off easy because the meat at this point is literally falling off the bone) and then break up any large chunks of meat so it's mixed throughout.

To the left, you'll see a picture of what the soup looked like when it was all done.  The cookbook recommends adding salt to taste, but I didn't add any (surprise, surprise) and I really enjoyed it exactly as it was.  In fact, the note that I left for myself in my cookbook so I remember I liked it was "Amazing!"

The recipe says that it serves 4 to 6 and I got exactly 6 servings out of it.  In terms of cost, the two big items to purchase are the pork chops and the chicken stock--but the latter isn't really necessary because you can just use water.  Either way, it's not an expensive meal.  With the chicken stock included, it comes to about $2.48 per serving.  Using water instead, it ends up only being about $1.65 per serving.  Either way, add a big salad and maybe some bread and you have an affordable meal that will help stretch your stipend.  In terms of calories, the soup isn't a big-calorie meal, so adding the salad and bread will give you a good dinner that won't pack on the pounds as you sit at your desk all day.  With the chicken stock, it comes out to about 134 calories per serving; without, it's about 114 calories per serving.  Not much either way and this is a recipe that I'd definitely make again!

Saturday, February 12, 2011

Asian Barbecue Skewers

I apologize for missing posting last weekend.  I meant to actually write this post while I was watching the Superbowl, but unfortunately my camera ran out of batteries so I couldn't upload my pictures and because my weeks are so busy, it just had to wait.

Anyway, last week my roommate and I had our own Superbowl party.  She told me that for the game, she was going to make stuffed mushrooms, Philly cheese steaks, and veggies with hummus.  As she was getting ready to go to the grocery store, I thought: my crock pot cookbooks have some appetizers in them so I should take this opportunity to make one of them!  We looked through the options and picked the Asian Barbecue Skewers from the Crock-Pot Incredibly Easy Recipes cookbook.

Luckily, we had most of the ingredients, so I asked my roommate to pick up boneless skinless chicken breasts, scallions, and wooden skewers.  Now, the recipe actually calls for boneless skinless chicken thighs, but, as I've mentioned in previous posts dealing with chicken, I've realize that the chicken breast is the cut of meat that I prefer so generally, I just get that regardless of what the recipe actually calls for.  My roommate suggested that I pound out the breasts a bit before cutting them into strips, because the breasts were thicker than chicken thighs would have been.

The two pounds of chicken breast that the recipe calls for actually makes quite a few strips, which I then had to put on the skewers.  I will note especially at this point that the cookbook says that when you layer the skewered chicken into the crock pot, you should do it as flat as possible.  Of course, I thought this was kind of silly.  It can only be so flat when the crock pot is of the size that it is.

Then you make the sauce, made out of soy sauce, brown sugar, sesame oil, and garlic.  We already had all of those ingredients (the soy sauce I bought when I made the Soy-Sake Asparagus back in December), though I had *just* purchased the sesame oil the day before when I had gone grocery shopping.  Now, the picture on the left is of the sauce after I put all the ingredients in.  I had wanted to take a picture that showed all of the individual ingredients, but while I was looking for my sesame oil, the soy sauce ate the brown sugar, so alas.

But here's where it gets important, leading to how I'd make this recipe differently were I to do it again.  The directions say, "Reserve 1/3 cup sauce; set aside.  Pour remaining sauce over skewers."  The picture on the right is what the dish looked like right after I followed this direction.  As you can see, the chicken is not covered by the sauce.  The dish cooks for three hours on low: that's two hours initially and then an additional hour after you turn the chicken over.  After it's done cooking, you put the chicken skewers on a plate and pour the remaining sauce over them.  The recipe says to garnish the chicken with sliced scallions and, optionally, toasted sesame seeds.  I started the recipe around 3:30 p.m., so it was already mid-way into the game when it was finished.  Unfortunately, I forgot about the scallions.

So this is what the skewers looked like when I served them.

And this is what it was supposed to look like according to the cookbook.

Now, the skewers weren't that bad, but the problem is that they cook unevenly in the sauce.  Even with turning them over before the last hour of cooking, as the directions say, the sauce is not evenly absorbed into all the chicken.  So, my recommendation?  Make more sauce.  If I were to make this again, I'd probably double or triple the amount of sauce that I make so that the chicken skewers would be completely covered in the sauce while cooking.

Now, we had a ton of leftovers (as you could probably have guessed, seeing as it was only two of us and my roommate had already made a massive amount of food), but I didn't really want to eat them as they were both because of the lack of flavor on some pieces and because they're a distinctly appetizer food.  To remedy this, I decided to make stir-fry.  I took all the chicken off the skewers and cut it into bite-sized pieces.

Then, I added it to some fresh stir-fry mixed vegetables from Trader Joe's (pricier than frozen mixed vegetables for stir-fry, but the price was well worth it for both the freshness and the variety in there).  This was all being cooked from the very beginning in the tiny bit of the sauce that I had saved from the original skewer recipe and sesame oil.

I also added some stir-fry sauce, just the standard type that you get in the grocery store and voila!  Just add rice and you have a quick meal... one that I really enjoyed!

Now, because I made stir fry out of this recipe, it's difficult to figure out exactly how many servings it came out to be, but the cookbook says four to six, so let's say that this came out to be six: two that we ate as skewers and four that I'm having as stir fry.  That comes out to be about 163 calories per serving of the chicken alone (or 165 had I remembered the scallions).  But honestly, as an appetizer, each person might have only one or two skewers, so the calorie count in actual practice might be half of what it is for a "serving."  Making it into a stir-fry upped the calorie count to about 260 calories per serving, not bad for a meal (of course, note that this doesn't count the basmati rice which can be up to 320 calories per serving depending on how much you serve yourself).

I am not going to try to figure out the cost per serving for this dish because I already had many of the ingredients, but the only items that tend to be a little more expensive (and not often on sale at the grocery store) are the sesame oil (used in the original recipe and the stir fry) and the stir-fry sauce.  So, this would be a good appetizer for the grad student to make to bring to the potluck department get-together at the beginning or end of the semester.

This was my dinner tonight (plus a salad that I had already finished when I took this picture).

Sunday, January 30, 2011

Chocolate Chip Cookies

I have always been fascinated by the desserts in my various crock pot cookbooks, especially ones that are cake-like.  For the last two years, however, I've taken the opportunity to try out some of these desserts for my department's Advent party.  (The problem with this is that, because I have to bring it to the party, some of the really awesome ones, which should really be served warm, won't work.)  Last year, I made the Chocolate Hazelnut Pudding Cake from the Crock-Pot Incredibly Easy Recipes cookbook, but this year I tried Chocolate Chip Cookies from The Gourmet Slow Cooker: Simple and Sophisticated Meals from Around the World.

The thing about this recipe is that you're really just making cookie dough and cooking it in the crock pot instead of the oven, so in that sense it's not something I would necessarily recommend if you want chocolate chip cookies.  It was fun for me because I wanted to try out another dessert from my crock pot and keep up the tradition of bringing a crock pot dessert to the Advent party, but were I to say, "Hey, I'd like to make some chocolate chip cookies from scratch!", this is not the way that I'd choose to make them.

You begin, however, by greasing the slow cooker.  Obviously, I don't have a picture of that.  The recipe calls for using butter or vegetable oil.  To make it easier, however, I just used a nonstick cooking spray (my roommate actually bought a nonstick cooking spray especially for baking, so I used that).  You also line the bottom of the crock pot with wax paper.  I should have taken a picture of that in retrospect because I had a fun time trying to get the wax paper cut to the right size to fit the bottom of the crock pot, but oh well.

Then you make the cookie dough, some of the steps of which you can see pictures of above.  You mix the wet ingredients together (butter, eggs, regular sugar, brown sugar, and vanilla extract) and the dry ingredients together, but separately from the wet ingredients (flour, baking soda, and salt -- in this case, I did add the salt).  After then mixing the wet and dry ingredients together, you add in semisweet chocolate chips (yum).  The recipe actually calls for chopped walnuts to be added as well, but I don't like nuts in my chocolate chip cookies, so I skipped this step.

Now, what I should have done in making this recipe was to use my roommate's KitchenAid mixer, but at the time I was trying to get the cookies made and get changed before the party so I wasn't really thinking about that.  It's okay, however, because I had a good time mixing in the chips by hand.  Also, I would guess that most graduate students, especially those who are newly out of undergrad, do not own a KitchenAid mixer, so what I did is actually more in line with the graduate student spirit, even though I wasn't really thinking of that at the time.

Finally, you smooth the dough into the bottom of the slow cooker, cover it, and then let it cook for three hours on low.  The cookbook says that you should cook it "on low for about 3 hours, until a toothpick inserted into the center comes out clean," and that you should "set the lid slightly ajar for the last 30 minutes."  I followed these directions, but then ran into the same problem I had when I made the cake in the crock pot the year before: I got paranoid because it looked like the cookies weren't done.  My paranoia is compounded by the fact that we never have toothpicks, so I have to use a knife to test done-ness when baking, something that doesn't have quite the same desired effect as a toothpick.

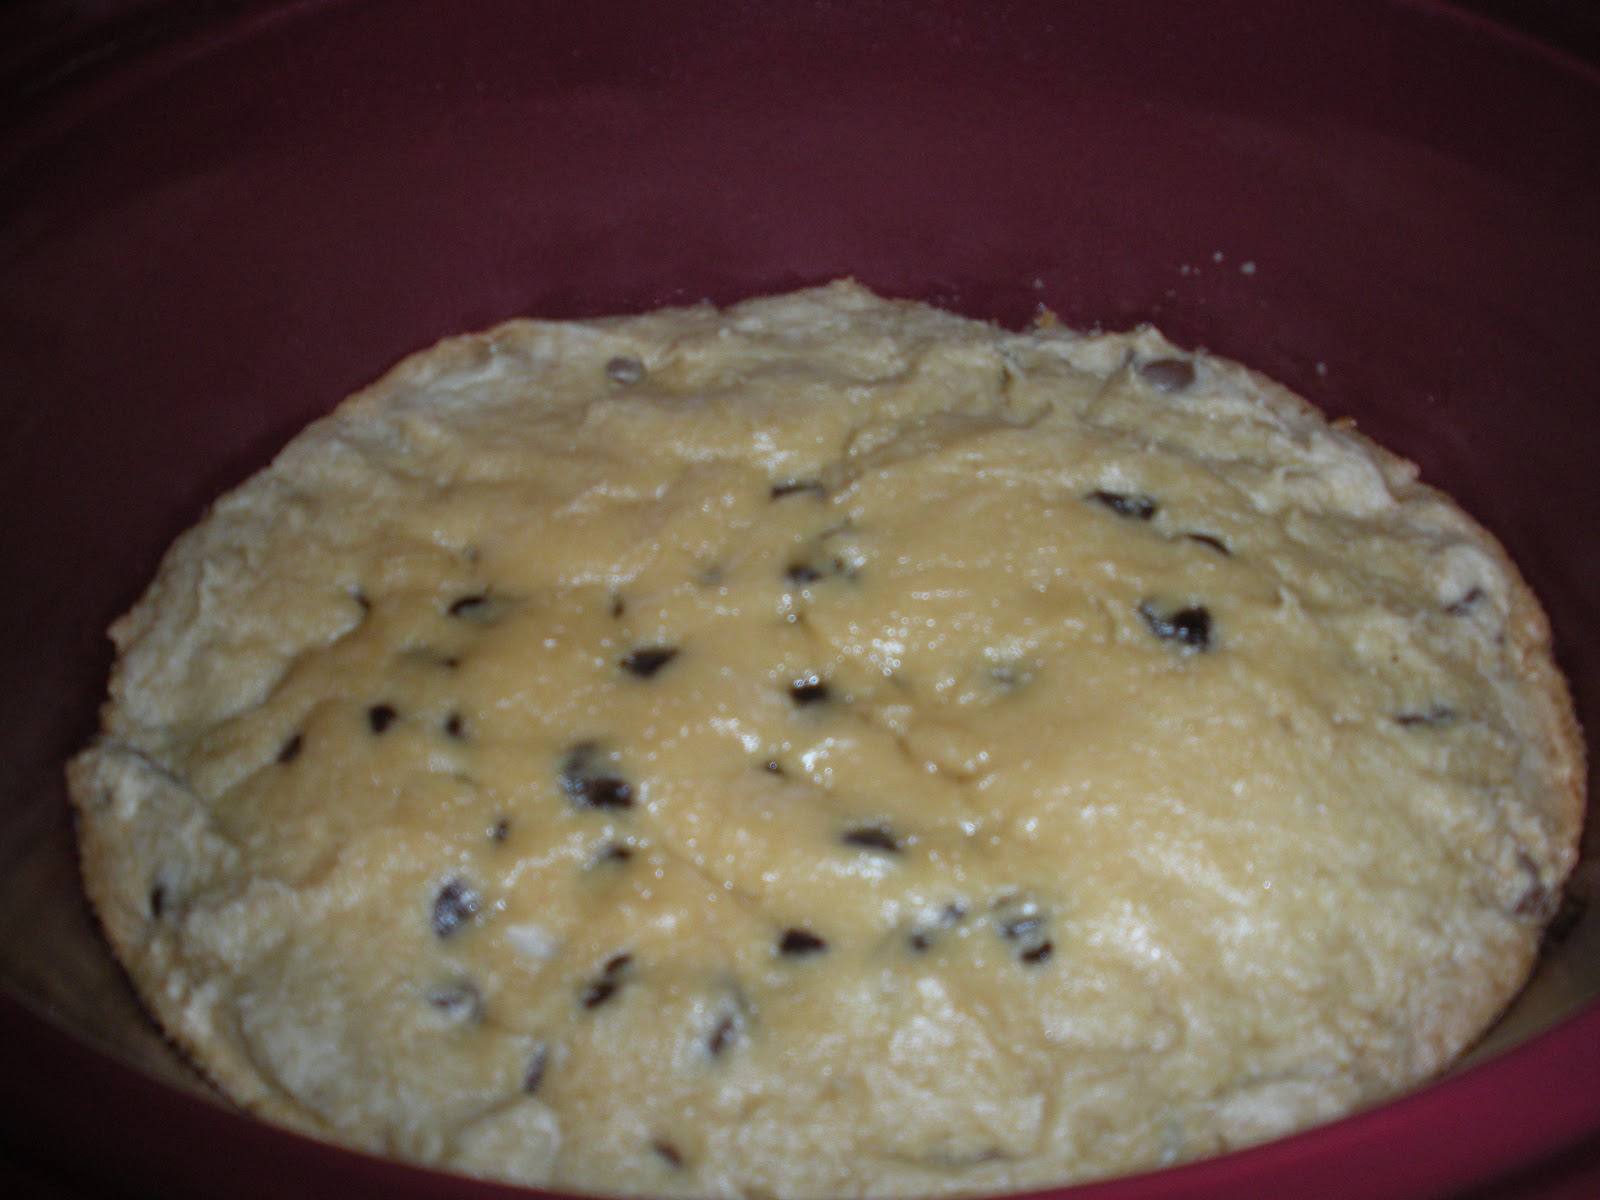
So this is what the dish looked like at the end of three hours.

And this is what it looked like after I let my paranoia get the better of me and kept it cooking for another hour.

What I did in the end is just to resist my paranoia and take it out even though I wasn't sure that it was done.  To take the cookies out of the crock pot, you remove the insert and let them cool for about 30 minutes before turning it over to dump the cookies out.

So the image to the right is what the cookies looked like when I had cut them for the Advent party.  The recipe says that it serves six to eight and obviously I got more slices out of that, but I think that the recipe expects you to cut bigger slices than I did.  Now, obviously, these don't really look like "cookies," per se, and it's actually really telling that the end of the recipe in the cookbook asks you to "cut the cake" (emphasis is my own).  Regardless, it wasn't that bad and I think it all got eaten at the Advent party (or at least a lot of it did).  It might have come out a bit dry because of my paranoid over-cooking, but it wasn't really too bad there either.  Were I to make this again, I'd take it out after three hours as recommended.

Now, as my readers know, normally and analyze the recipes I review in terms of cost and calories per serving.  I'm not going to do that for this one, however.  I had all of the ingredients already except for vanilla extract and chocolate chips, so the amount I spent doesn't really reflect the cost per serving.  In terms of calories... well, they're chocolate chip cookies... they're not healthy.  I'll just leave it at that.

Friday, January 21, 2011

Soy-Sake Asparagus

The Not Your Mother's Slow Cooker Cookbook has a whole chapter on making side dishes in the slow cooker, one that I haven't really had an opportunity to take advantage of.  There are many reasons for this, the primary one being that I'd rather make a main dish or a full meal in the crock pot than just a side dish (in which case I'd still have to come home and cook.  (The second major reason is that vegetable dishes often cook faster than meat dishes, so they're not ones that you can leave on all day.)  However, the Turkey with Pecan-Cherry Stuffing that I made over Thanksgiving lasted for quite a while, such that I finished all the green beans that I had made to go with it and by early December needed to come up with another vegetable side in order to finish off the leftovers.

I was excited to try one of the side dishes in my cookbook, so I looked through the chapter and decided on Soy-Sake Asparagus, which I made on December 7.  This dish was pretty easy, but had to be made when I got home from school because it only cooks for just over an hour.  You prep the asparagus normally--cleaning it and snapping off the ends--before laying it in the crock pot.

There are very few other ingredients to be added.  Most important, of course, is the soy sauce and sake.  This dish, unfortunately, ends up not being the cheapest dish to make because of the sake.  You only need one tablespoon and in the grocery store, you can only get a full bottle.  My roommate suggested next time that I might just go to a nearby Japanese restaurant and ask if they could give me a little bit of sake instead of purchasing the whole bottle.  Has anyone ever done that when cooking with sake?

So, you drizzle on a little bit of soy sauce, sake, and olive oil, adding a pinch of brown sugar and a pinch of salt.  Obviously, I did not add any salt to my dish, especially because I figured that the soy sauce would be enough for a salty flavor.  The fun part of this recipe is that you have to toss the asparagus to coat it with all the seasonings, and the only real way to do this effectively is with your hands.  Then you cook it on high for between an hour and fifteen minutes and an hour and a half.  The cookbook suggests serving it with toasted sesame seeds as an optional garnish, but I decided not to bother with that.

This is what the asparagus looked like after being tossed.

And this is what it looked like after cooking.

According to the recipe, you're supposed to get four or five servings out of this dish.  I, unfortunately, got nowhere near that many servings, but that is possibly my fault.  I mean, this asparagus was absolutely delicious.  So I served myself generous portions and even snacked on the asparagus cold as I was putting it away and taking it out to serve each time.  The asparagus was cooked just perfectly, tender but firm.  I think in the end I had maybe three servings (not counting the snacking that I did each time).  My large servings were about 125 calories each, but the normal size serving that the recipe expects you'll have is only about 70-90 calories per serving.  I'm not going to bother to calculate the cost per serving of this dish because I'm sure that it's high because of the sake, however, this dish did include a lot of ingredients that I normally have in the house already: olive oil, soy sauce, and brown sugar.  Because of this, if you can get sake another way (as in not buying a whole bottle), this dish could actually be really cheap to make, good for the grad student budget.

Now, I started off this post explaining why I hadn't made many side dishes in my crock pot (the same could be said about desserts actually), but my problems have recently been solved.  I received a great surprise Christmas gift in the mail this week from my friend Roopsi.
The dual crock pot that I've been coveting!!!  I actually told Roopsi that I was going to make a whole post about receiving this gift, but it ended up fitting in to this post about making side dishes in the crock pot.  Now I don't have to worry anymore about using up the crock pot to make a side dish because I can make a main dish on one side and either a side dish or a dessert on the other.  The only drawback here is that each pot is smaller, so I might not be able to make a whole recipe of a main dish, but I'm still excited about it!  Stay tuned for some exciting new dual-dish posts in the future!

Friday, January 14, 2011

Beef & Beer Stew

Over this holiday break, I made another crock pot meal, this time using my fiance's roommate's crock pot.  We wanted to have a special something to do on New Years, but unfortunately my fiance, an EMT, had to work until 10 p.m. (or rather, that is when he was scheduled until, he ended up actually having to work overtime!).  So, we decided that a fun thing to do for just us would be for me to make a crock pot meal and we'd have a late dinner with sparkling wine when he got home.  For this, since I still don't have my cookbooks with me, I decided to make a "manly" dish: the Beer & Beef Stew from cdkitchen.com (the site actually has a "bachelor's" beer and beef stew as well, but since there were no vegetables in that, I refused to make it for our dinner).  The cool thing about cdkitchen.com is that you can adjust the servings that you want to make and it will tell you automatically how much of the ingredients you need for that size of a recipe.  Because it was just the two of us and we were using a smaller crock pot, I only made a half a recipe.

What I love about this dish is it is one of those ones where you just throw everything into the crock pot and turn it on.  It is also good that it is one where you could chop all the vegetables in advance so in the morning you'd really only have to throw everything in together.  As you can see in the picture above, first I added all the vegetables: onion, garlic, carrots, celery, and potatoes.  Then I added the stew beef, tomato paste, and the spices: pepper and oregano.  You will not be surprised to know that I did not add the salt.

Next, I added the only liquid that this stew is cooked in: beer.  The recipe doesn't specify what kind of beer, though I imagine that it might taste different depending on what kind of beer you're using.  Because we had just purchased Tecate for our camping trip, that is what I used for the stew.

After stirring it all together, to the right is what it looked like when I turned it on.  The stew is supposed to cook for 8 to 10 hours on low and then you're supposed to mix together butter and flour and add it to the stew, allowing the broth to thicken.  I did not do this last step partly because I didn't really care in this case about thickening it and partly because, with my fiance being called to stay overtime at work, I forgot about finishing the recipe before he got home.

This is what it looked like when it was done cooking.

Now, I made a half a recipe, according to which I should get three servings out of it.  Of course, that all depends on how big of a serving you make.  My fiance and I each ate out of small bowls and ended up having two servings each.  Then my fiance took all the leftovers to work the next day (yes, he had to work on BOTH New Year's Eve and New Year's Day) and finished it for lunch.  So, one could argue that we got five servings out of it, or just that we got three servings as the recipe said.  Anyway, my fiance loved the stew and I thought it was decent, but not my best stew ever.  I think it might be interesting to try it with a darker beer.

In terms of cost, I spent $14.05 on the ingredients for this recipe, but of course I got more onions and more celery than the recipe called for.  We already had the spices and garlic, but we had purchased an 18-pack of the Tecate beer, which came to $14.69.  So, assuming that we could this as having made three servings, we actually spent $9.58 per serving.  If we had needed to buy the spices and garlic as well, it would have come to a whopping $11.58 per serving.  However, the big expense was obviously the beer and since we were purchasing an 18-pack and then only using one can, it seems unfair to add the whole pack on, so I'll say that this stew would cost approximately $20.87 to make if you needed to buy everything (about $6.96 per serving) or $14.87 as I cooked it (about $4.96 per serving).  So, although this is definitely not a super expensive meal, it is not as cheap as some of the ones I've made in the past.  Also, because it's a traditional stew that includes beef and potato (both higher calorie items) and the beer, this is not as low-calories as some of the other dishes that I've made: it comes out to about 584 calories per serving.  Now, of course, all of this was calculated assuming that we got three servings out of this dish.  If you were to serve yourself smaller bowls (like we did originally) and eat it with something on the side (say, a large salad), you could probably get five or six servings out of this dish.  That would make it out to be only about 292 calories per serving and a cost of $2.48 per serving.  That would be much healthier and much nicer on the graduate student budget.