Sunday, April 10, 2011

Pumpkin-Cranberry Custard

I'm going to start off by apologizing for neglecting this blog for so long.  It feels like recently that's how I've started off every single post, but one of the difficulties of the grad student lifestyle is that your life has a tendency to get busy and so other things, like this blog or, say, replying to e-mails, get put to the side.

In fact, I have a tendency to get so busy with schoolwork that my attention to other things ends up somewhat lacking, which is what I'm going to illustrate in this post.  Before I even start, let me explain that this dish was a failure.  I didn't even realize how much of a failure, however, until I reread the recipe and saw what my mistake was.  What happened was, on December 12, I decided to try out one of the desserts in my Crock-Pot Incredibly Easy Recipes cookbook for my roommate and one of her friends because I was leaving to go see my family in Massachusetts soon and therefore I didn't want to make a whole crock pot meal.

The great thing about this recipe is that it is in the "One-Step Dishes" section of the cookbook.  All you have to do is basically throw the ingredients in and mix them all together.  In this mix, as you can see to the right, the recipe calls for pumpkin pie filling, evaporated milk, dried cranberries, and eggs.  If you're looking closely at all the pictures, you might already be able to guess where I went wrong in this recipe.  Anyway, you stir the ingredients all together and cook it on high for four to four and a half hours.

This is what it looked like after stirring.

And this is what it looked like after cooking on low.

The recipe recommends two optional toppings: whipped cream and "crushed or whole gingersnap cookies."  Now, since we're talking about my lack of attention in this recipe, I should add that it was only just now as I'm looking at the recipe to write this blog post, that I realized the recipe says that the cookies can be crushed or whole.  I, as you can see from the image to the left, crushed them.  However, that said, I would probably crush them again were I to try to make this recipe again because I like the way you get some gingersnap with your custard on every bite.

So, were you able to figure out what I did wrong?  I'll give you a hint: while eating the custard, we realized that it didn't really taste sweet enough.  It was edible, for sure, but only if you drenched it with whipped cream (which was sweetened).  If you can figure out what I did wrong, leave a comment below.  I'm curious to see who the first person to get it will be... and it shouldn't be hard to figure out from the images I posted and what I wrote.

Unfortunately, I can't figure out the cost or calories per serving this time because we only ate the three servings before I left to see my family.  Thus, although the recipe says it makes four to six servings, I cannot judge the accuracy of that claim (and in this cookbook there is a tendency for the recipes to make much more than they say they do).  In terms of cost, none of the ingredients are too expensive.  I actually bought Craisins at the store and they were on sale (2 for $5.00) before realizing when I got home that I already had dried cranberries from Trader Joe's.  The remaining ingredients were just over $6.00, though I already had eggs and my roommate already had gingersnaps.  You can probably get everything you need for this dessert for around $10.00, so you could probably estimate around $2.00/serving.

So my overall thoughts on this recipe: it might not be a bad dessert.  It was bad how I made it because I wasn't paying enough attention due to end-of-the-semester business, but I think if one were to really follow the directions it would be really good.  Maybe I'll just have to try it again next holiday season...

Sunday, March 6, 2011

Cock-a-Leekie Soup

One of the pitfalls of being a graduate student is having weeks where your work overload just becomes too much.  Last week was one of those weeks.  (You know you have a problem when the head of the department tells you that you look tired and stressed.)  So, unfortunately, I had to skip updating the blog.

"I'm making Cock-a-Leekie soup."  "What???"  "Cock-a-Leekie soup."  "Watch your mouth!"

Back in November, I made Cock-a-Leekie soup, one that I expected to be great for the graduate student lifestyle because the Not Your Mother's Slow Cooker Cookbook says that it is "as economical as it is delicious."  There's a lot of chopping to do to prep this soup so I highly recommend doing it the night before and sticking it in the fridge (as you can see I did).

I chopped the leeks, potatoes, onion and boneless, skinless chicken breasts ahead of time (of course, the recipe called for boneless, skinless chicken thighs, but as you know, I prefer chicken breasts).  So, in the morning I was able to just throw everything into the crock pot.  To the ingredients that I prepped the night before, I added barley, parsley, and a bay leaf.  The recipe calls for a Turkish bay leaf or half of a California bay leaf, but I honestly didn't care enough about the difference in order to care to buy new bay leafs and I actually just threw in one whole bay leaf from the grocery store.

You can add either chicken broth or water to this recipe.  In this case, I already had some chicken broth from a previous recipe, so I used that.  Honestly, if I hadn't already had the chicken broth, I probably would have used water, but I'm sure the chicken broth adds a lot of flavor so it all worked out in this case.  After adding the broth or water you just stir it all together and let it cook on low for 6 to 8 hours.  Thus, it's a perfect one to turn on when you're heading out the door and then just turn off when you get home in the evening.

This is what the soup looked like before I turned it on.

And this is what it looked like after cooking.

Once the soup is done cooking, you add salt and pepper (though I did not add the salt) and stir it again.  You're supposed to serve it with a splash of Worcestershire sauce, and topped with chopped prunes and parsley.  Now, the chopped parsley as a garnish didn't last as long as the soup itself did, but having it with just the prunes and the Worcestershire sauce was still good.  The soup, by itself, does not have all that much flavor, but the Worcestershire sauce adds a kick to it and the prunes add some sweetness.  I ended up adding more and more of each every time I served it and they became less of a garnish and more of the part of the soup.

So, in terms of the original claim that the soup is "as economical as it is delicious," I would agree with the "delicious" claim, but only as long as it is served with the Worcestershire sauce and prunes.  The cookbook says that it serves 4 to 5, but I definitely got a lot more servings out of it.  It was a long time ago, but I think I actually ended up getting 8 servings overall.  So, in terms of cost, the only really expensive item is the chicken, especially if you go with store brands for the bay leaves, chicken broth, prunes, and Worcestershire sauce.  Thus, even counting in the chicken broth and the items that I did not have to buy because I already had them, this comes out to about $3.00/serving.  (Though, as I cooked it, it was only about $2.12/serving!)  So, I guess Beth Hensperger and Julie Kaufmann are right to claim that it is "as economical as it is delicious."  Health-wise, the soup comes out to about 185 calories per serving before you add in the prunes and Worcestershire sauce, which would add probably 65-85 more calories per serving, depending on how generous you are with the prunes.  Either way, it's under 300 calories per serving, and makes for a filling meal alongside a salad.

Sunday, February 20, 2011

French Split Pea Soup

Recently I've been trying to catch up on posts about crock pot meals that I made at the end of last semester, but never had an opportunity to actually post about.  I've already mentioned in several posts the birthday gift that I received from my future mother-in-law, The Gourmet Slow Cooker: Simple and Sophisticated Meals from Around the World.  Well, the first meal that I made in that was back in the beginning of November, French Split Pea Soup.  The difficult thing about this cookbook, that I've mentioned before, is that it often requires either several steps to prepare the ingredients, or asks you to add additinal ingredients part-way through the recipe.  Now, in some ways this could be considered good for the graduate student lifestyle--when you have the ability to work from home, you can easily be at home to add additional ingredients, or take longer to prepare the crock pot in the morning.  For those who spend all day at school, like me, however, such recipes are more difficult.

So, this French Split Pea Soup is probably the easiest recipe to put together in the whole cookbook.  All of the preparatory work, rinsing and sorting through the split peas and chopping the onion, carrots, and celery, can be done the night before, making the actual prep work in the morning a piece of cake.  (As you can see from the image above, I did the prep work the night before to make it much easier for me to throw everything together in the morning.)

So, in the morning when you get up, you just need to mix all the ingredients you prepped the night before in the crock pot.  Another thing that is good about this recipe is that it doesn't necessarily require any broth.  The recipe asks for water or chicken stock.  I did use chicken stock, but that was only because it was on sale and I had a coupon.  If I hadn't had that coupon, I would have definitely just used water in this recipe.

The last ingredient, which unfortunately makes this a not-vegitarian-friendly recipe, is a smoked pork chop, which you can see me adding to the right.

I cannot emphasize enough throughout this post how easy this recipe is.  After mixing all the ingredients together, as I've illustrated here, you just cook the soup on low for 8-10 hours.  That timing is perfect if you have to be out of the house all day at school (or work) and the house will smell amazing when you get home.  After letting it cook for that long, you just remove the bone from the pork chop (which will come off easy because the meat at this point is literally falling off the bone) and then break up any large chunks of meat so it's mixed throughout.

To the left, you'll see a picture of what the soup looked like when it was all done.  The cookbook recommends adding salt to taste, but I didn't add any (surprise, surprise) and I really enjoyed it exactly as it was.  In fact, the note that I left for myself in my cookbook so I remember I liked it was "Amazing!"

The recipe says that it serves 4 to 6 and I got exactly 6 servings out of it.  In terms of cost, the two big items to purchase are the pork chops and the chicken stock--but the latter isn't really necessary because you can just use water.  Either way, it's not an expensive meal.  With the chicken stock included, it comes to about $2.48 per serving.  Using water instead, it ends up only being about $1.65 per serving.  Either way, add a big salad and maybe some bread and you have an affordable meal that will help stretch your stipend.  In terms of calories, the soup isn't a big-calorie meal, so adding the salad and bread will give you a good dinner that won't pack on the pounds as you sit at your desk all day.  With the chicken stock, it comes out to about 134 calories per serving; without, it's about 114 calories per serving.  Not much either way and this is a recipe that I'd definitely make again!

Saturday, February 12, 2011

Asian Barbecue Skewers

I apologize for missing posting last weekend.  I meant to actually write this post while I was watching the Superbowl, but unfortunately my camera ran out of batteries so I couldn't upload my pictures and because my weeks are so busy, it just had to wait.

Anyway, last week my roommate and I had our own Superbowl party.  She told me that for the game, she was going to make stuffed mushrooms, Philly cheese steaks, and veggies with hummus.  As she was getting ready to go to the grocery store, I thought: my crock pot cookbooks have some appetizers in them so I should take this opportunity to make one of them!  We looked through the options and picked the Asian Barbecue Skewers from the Crock-Pot Incredibly Easy Recipes cookbook.

Luckily, we had most of the ingredients, so I asked my roommate to pick up boneless skinless chicken breasts, scallions, and wooden skewers.  Now, the recipe actually calls for boneless skinless chicken thighs, but, as I've mentioned in previous posts dealing with chicken, I've realize that the chicken breast is the cut of meat that I prefer so generally, I just get that regardless of what the recipe actually calls for.  My roommate suggested that I pound out the breasts a bit before cutting them into strips, because the breasts were thicker than chicken thighs would have been.

The two pounds of chicken breast that the recipe calls for actually makes quite a few strips, which I then had to put on the skewers.  I will note especially at this point that the cookbook says that when you layer the skewered chicken into the crock pot, you should do it as flat as possible.  Of course, I thought this was kind of silly.  It can only be so flat when the crock pot is of the size that it is.

Then you make the sauce, made out of soy sauce, brown sugar, sesame oil, and garlic.  We already had all of those ingredients (the soy sauce I bought when I made the Soy-Sake Asparagus back in December), though I had *just* purchased the sesame oil the day before when I had gone grocery shopping.  Now, the picture on the left is of the sauce after I put all the ingredients in.  I had wanted to take a picture that showed all of the individual ingredients, but while I was looking for my sesame oil, the soy sauce ate the brown sugar, so alas.

But here's where it gets important, leading to how I'd make this recipe differently were I to do it again.  The directions say, "Reserve 1/3 cup sauce; set aside.  Pour remaining sauce over skewers."  The picture on the right is what the dish looked like right after I followed this direction.  As you can see, the chicken is not covered by the sauce.  The dish cooks for three hours on low: that's two hours initially and then an additional hour after you turn the chicken over.  After it's done cooking, you put the chicken skewers on a plate and pour the remaining sauce over them.  The recipe says to garnish the chicken with sliced scallions and, optionally, toasted sesame seeds.  I started the recipe around 3:30 p.m., so it was already mid-way into the game when it was finished.  Unfortunately, I forgot about the scallions.

So this is what the skewers looked like when I served them.

And this is what it was supposed to look like according to the cookbook.

Now, the skewers weren't that bad, but the problem is that they cook unevenly in the sauce.  Even with turning them over before the last hour of cooking, as the directions say, the sauce is not evenly absorbed into all the chicken.  So, my recommendation?  Make more sauce.  If I were to make this again, I'd probably double or triple the amount of sauce that I make so that the chicken skewers would be completely covered in the sauce while cooking.

Now, we had a ton of leftovers (as you could probably have guessed, seeing as it was only two of us and my roommate had already made a massive amount of food), but I didn't really want to eat them as they were both because of the lack of flavor on some pieces and because they're a distinctly appetizer food.  To remedy this, I decided to make stir-fry.  I took all the chicken off the skewers and cut it into bite-sized pieces.

Then, I added it to some fresh stir-fry mixed vegetables from Trader Joe's (pricier than frozen mixed vegetables for stir-fry, but the price was well worth it for both the freshness and the variety in there).  This was all being cooked from the very beginning in the tiny bit of the sauce that I had saved from the original skewer recipe and sesame oil.

I also added some stir-fry sauce, just the standard type that you get in the grocery store and voila!  Just add rice and you have a quick meal... one that I really enjoyed!

Now, because I made stir fry out of this recipe, it's difficult to figure out exactly how many servings it came out to be, but the cookbook says four to six, so let's say that this came out to be six: two that we ate as skewers and four that I'm having as stir fry.  That comes out to be about 163 calories per serving of the chicken alone (or 165 had I remembered the scallions).  But honestly, as an appetizer, each person might have only one or two skewers, so the calorie count in actual practice might be half of what it is for a "serving."  Making it into a stir-fry upped the calorie count to about 260 calories per serving, not bad for a meal (of course, note that this doesn't count the basmati rice which can be up to 320 calories per serving depending on how much you serve yourself).

I am not going to try to figure out the cost per serving for this dish because I already had many of the ingredients, but the only items that tend to be a little more expensive (and not often on sale at the grocery store) are the sesame oil (used in the original recipe and the stir fry) and the stir-fry sauce.  So, this would be a good appetizer for the grad student to make to bring to the potluck department get-together at the beginning or end of the semester.

This was my dinner tonight (plus a salad that I had already finished when I took this picture).

Sunday, January 30, 2011

Chocolate Chip Cookies

I have always been fascinated by the desserts in my various crock pot cookbooks, especially ones that are cake-like.  For the last two years, however, I've taken the opportunity to try out some of these desserts for my department's Advent party.  (The problem with this is that, because I have to bring it to the party, some of the really awesome ones, which should really be served warm, won't work.)  Last year, I made the Chocolate Hazelnut Pudding Cake from the Crock-Pot Incredibly Easy Recipes cookbook, but this year I tried Chocolate Chip Cookies from The Gourmet Slow Cooker: Simple and Sophisticated Meals from Around the World.

The thing about this recipe is that you're really just making cookie dough and cooking it in the crock pot instead of the oven, so in that sense it's not something I would necessarily recommend if you want chocolate chip cookies.  It was fun for me because I wanted to try out another dessert from my crock pot and keep up the tradition of bringing a crock pot dessert to the Advent party, but were I to say, "Hey, I'd like to make some chocolate chip cookies from scratch!", this is not the way that I'd choose to make them.

You begin, however, by greasing the slow cooker.  Obviously, I don't have a picture of that.  The recipe calls for using butter or vegetable oil.  To make it easier, however, I just used a nonstick cooking spray (my roommate actually bought a nonstick cooking spray especially for baking, so I used that).  You also line the bottom of the crock pot with wax paper.  I should have taken a picture of that in retrospect because I had a fun time trying to get the wax paper cut to the right size to fit the bottom of the crock pot, but oh well.

Then you make the cookie dough, some of the steps of which you can see pictures of above.  You mix the wet ingredients together (butter, eggs, regular sugar, brown sugar, and vanilla extract) and the dry ingredients together, but separately from the wet ingredients (flour, baking soda, and salt -- in this case, I did add the salt).  After then mixing the wet and dry ingredients together, you add in semisweet chocolate chips (yum).  The recipe actually calls for chopped walnuts to be added as well, but I don't like nuts in my chocolate chip cookies, so I skipped this step.

Now, what I should have done in making this recipe was to use my roommate's KitchenAid mixer, but at the time I was trying to get the cookies made and get changed before the party so I wasn't really thinking about that.  It's okay, however, because I had a good time mixing in the chips by hand.  Also, I would guess that most graduate students, especially those who are newly out of undergrad, do not own a KitchenAid mixer, so what I did is actually more in line with the graduate student spirit, even though I wasn't really thinking of that at the time.

Finally, you smooth the dough into the bottom of the slow cooker, cover it, and then let it cook for three hours on low.  The cookbook says that you should cook it "on low for about 3 hours, until a toothpick inserted into the center comes out clean," and that you should "set the lid slightly ajar for the last 30 minutes."  I followed these directions, but then ran into the same problem I had when I made the cake in the crock pot the year before: I got paranoid because it looked like the cookies weren't done.  My paranoia is compounded by the fact that we never have toothpicks, so I have to use a knife to test done-ness when baking, something that doesn't have quite the same desired effect as a toothpick.

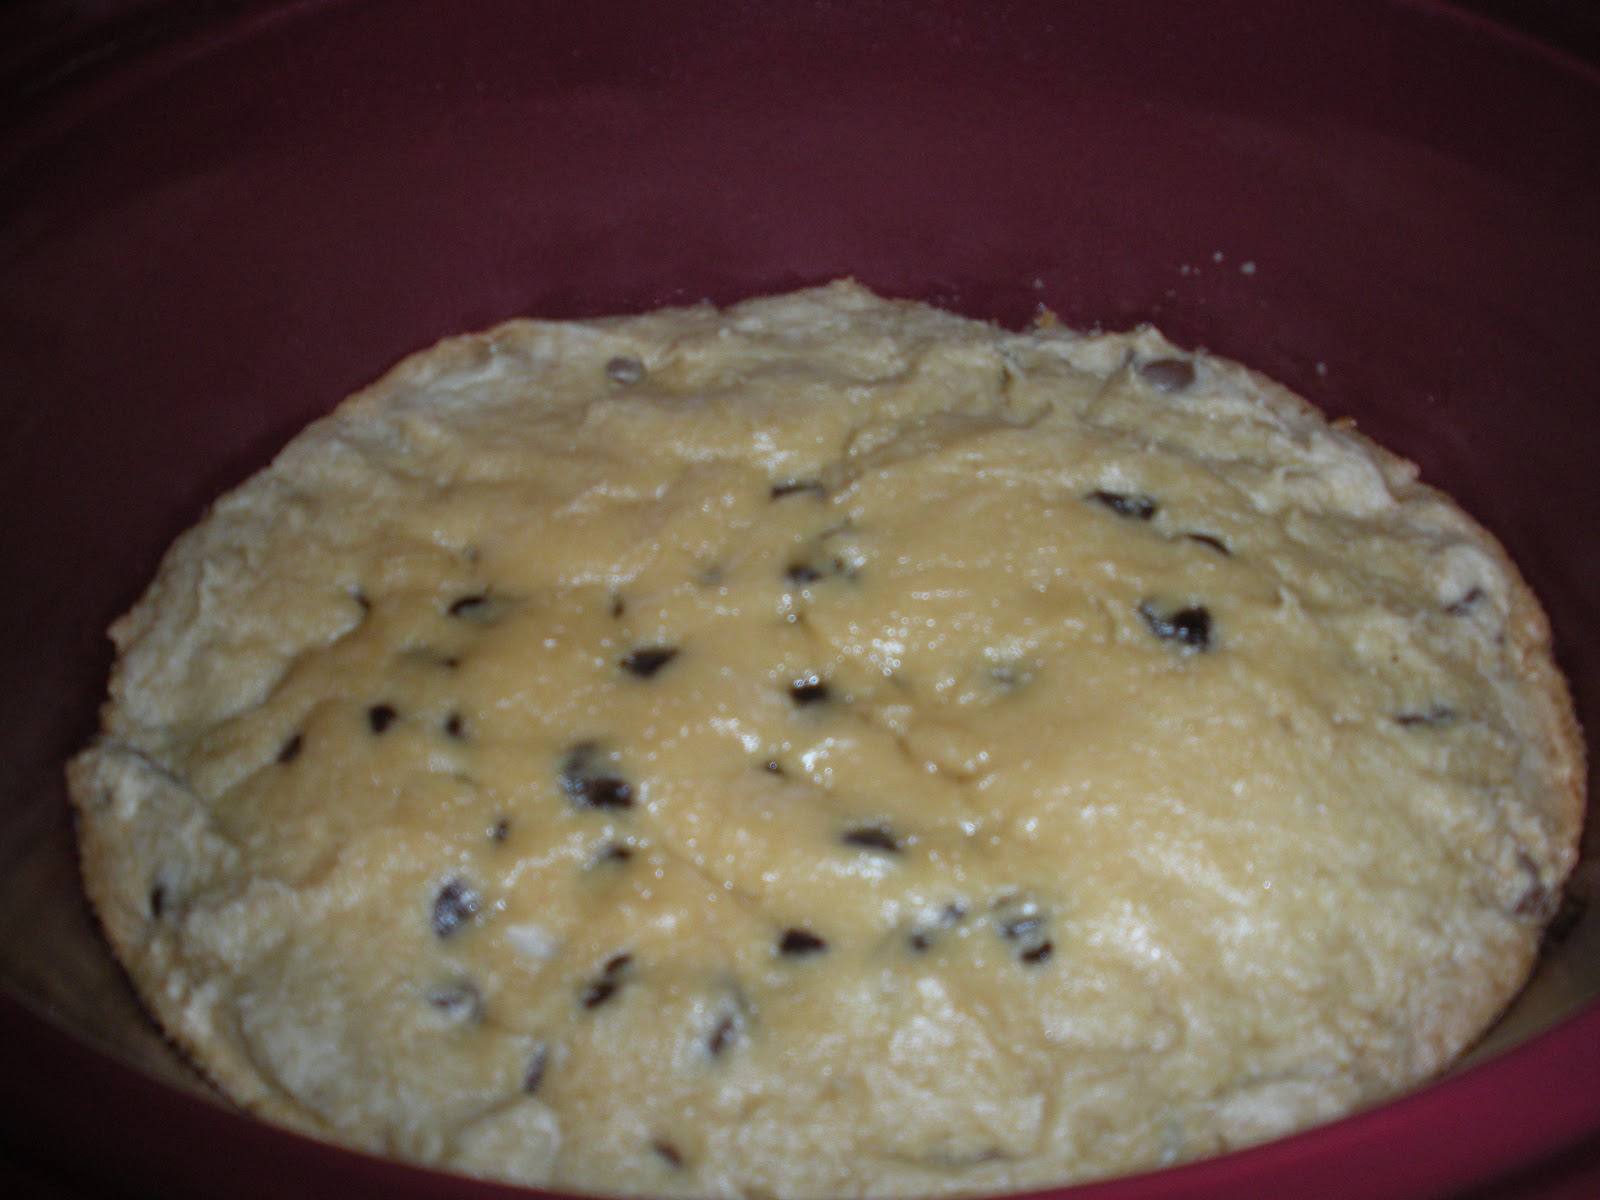
So this is what the dish looked like at the end of three hours.

And this is what it looked like after I let my paranoia get the better of me and kept it cooking for another hour.

What I did in the end is just to resist my paranoia and take it out even though I wasn't sure that it was done.  To take the cookies out of the crock pot, you remove the insert and let them cool for about 30 minutes before turning it over to dump the cookies out.

So the image to the right is what the cookies looked like when I had cut them for the Advent party.  The recipe says that it serves six to eight and obviously I got more slices out of that, but I think that the recipe expects you to cut bigger slices than I did.  Now, obviously, these don't really look like "cookies," per se, and it's actually really telling that the end of the recipe in the cookbook asks you to "cut the cake" (emphasis is my own).  Regardless, it wasn't that bad and I think it all got eaten at the Advent party (or at least a lot of it did).  It might have come out a bit dry because of my paranoid over-cooking, but it wasn't really too bad there either.  Were I to make this again, I'd take it out after three hours as recommended.

Now, as my readers know, normally and analyze the recipes I review in terms of cost and calories per serving.  I'm not going to do that for this one, however.  I had all of the ingredients already except for vanilla extract and chocolate chips, so the amount I spent doesn't really reflect the cost per serving.  In terms of calories... well, they're chocolate chip cookies... they're not healthy.  I'll just leave it at that.